A tale of two Wayland desktops

Because simple is enemy to fun

I have been working since a few years now. After leaving academia, I did not expect to be able to retain control over my work-provided machine for so long. In all these years, I changed a number of employers and every time I was given a laptop to work with. Thanks to the size of the companies I was employed by at the beginning of my career, no strict IT policy was in place and I was able to install my favorite GNU/Linux1 flavor all the times (Archlinux, BTW). Then, some years ago, I made the jump inside a slightly bigger company (a startup that was transitioning into a corporation) and I hit for the first time the wall of IT bureaucracy. I was required to install an EDR2 software on the company laptop. My drama was that I was also using said laptop as my personal one (I know, bad idea).

After changing company, and realizing that this was going to be the industry standard, I decided to buy a personal laptop, removing all my stuff from the work machine.

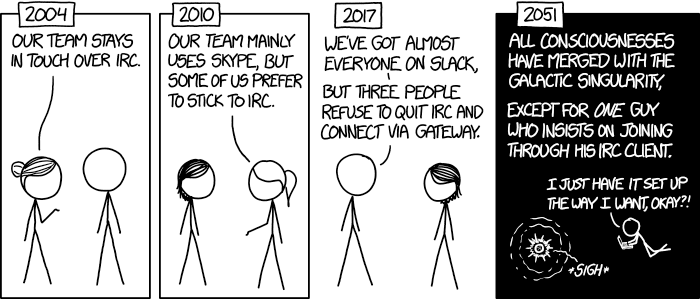
This might make the end of the story: and they lived happily ever after. Not so fast. I have come to like most of my job-related routine, but from time to time I want to also slack at my own pace, like chatting with my friends over IRC or hacking something I don’t necessary feel comfortable my employer knowing about3.

One possible solution could be to keep the two laptops turned on and open side by side, and switch between them. But I am lazy and I have not enough space on my desk. I want to use just one screen and the same keyboard and mouse to interact with both laptops.

First iteration

My first iteration was to do remote desktop on my work laptop from my personal laptop.
This was not ideal: the keyboard capture logic depends heavily on the remote desktop technology and program (VNC vs RDP, different clients implementing them in slightly different ways). Moreover, when I was focused away from the work remote desktop session, I was often missing the notifications from that environment.

I think I resisted several months with this solution, but then I relized I wanted a better setup.

Waypipe

I really wanted to have just something executing in the context of the work laptop, but displayed on my personal laptop desktop environment. Thanks to my FoMO4, I left X11 back a long time ago and I am fully on Wayland-based window managers since some years now (sway and more recently niri). This has led me through quite some pain any time I needed to do screen sharing, but has graced me with a very lovely piece of software: waypipe.

If you ever tried ssh -X, it does a similar thing: it proxies wayland applications from the remote machine to the local one through ssh. Because it is wayland-aware, it allows to forward single wayland applications from one desktop to the other and makes the remote one properly react under events from the local desktop (for example, resizing works as expected and spawning another remote application from inside one that is already running works too).

Assuming that the window manager is already running on the remote machine, I can simply5

# in one terminal
waypipe ssh user@worklaptop slack
# in another terminal
waypipe ssh user@worklaptop chromium

The rest of my workflow is mostly terminal based, so I just ssh into the machine and create a tmux session.

Notifications

There is just one piece missing here: I want to receive on my personal laptop the notifications from the work laptop, together with my local ones.
I did not find any pre-packaged solution and I came up with two projects that address most of my needs:

  • scapegoat: a set of programs to securely forward notifications from one Linux machine to another.
  • notilog: a set of programs to store notifications and access their history.

Both interact with dbus through the org.freedesktop.Notifications interface, in different ways.

scapegoat

Notifications in most Linux desktop environments are managed by and delivered through dbus, a bespoke (and quite complex) IPC6 solution.
To handle (i.e. display and react to) notifications, a program must implement the org.freedesktop.Notifications interface and register as such (but only one implementor at a time is allowed to be registered). In my desktop setup, I generally use mako as notification program. The idea with scapegoat is to replace such program, registering as notification handler on the work laptop, and then forward via network all the notifications to another program running on the personal machine via network. This program will deliver the notification, adequately mangled, to the local notification handler (again, mako in my case).

I called the side on the remote (work) laptop scapegoat-source and the one on the local (personal) laptop scapegoat-sink.
Originally, they spoke through a unix socket forwarded through ssh, but this proved unreliable. I then resorted to a gRPC implementation, to leverage bidirectional communication for notification acknowledgement and mutual authentication through mTLS7.

notilog

Even now that I am able to forward notifications from one laptop to the other, I can still miss notifications. The amount of sources of notifications I have is too big, and if it happens I miss one I want to be able to consult a history of them to make it easier for me to switch to the right application, instead of searching through many.

Enter, notilogctl and notilogd. The latter is a daemon that snoops on the local flow of notifications, without blocking them, and logs them either in memory or in a sqlite database. The former is a simple cli to access the history, through the daemon. It offers basic filtering capabilities and pretty printing.
Snooping without intercepting is handy because notilogd does not need to register itself as a org.freedesktop.Notifications implementor, and I can have mako running at the same time. It does so using a debug mechanism offered by dbus.

Swan song

Unfortunately, this will soon come to a halt. The new company I am going to work for mandates mac laptops. A Linux VM might be an option, but I still have to investigate if it is possible.
I expect to be forced back (I had a mac very many years ago) into that glossed world of polished UIs, in a very good looking glass prison. I already begun investigating if there is any mechanism to port scapegoat to macos, but it seems the OS actively prevents handing notifications as they are considered privileged information. The philosophy is clear: the user is a consumer, the ecosystem is curated (i.e. controlled) by apple and is the opposite of open.

  1. RMS, please forgive my lazyness: I will write just Linux in the rest of this post. ↩︎
  2. Endpoint Detection and Response (wikipedia): software with kernel-level privileged access, whose aim is to monitor and control the employee machine. The reason for these class of software being required in most medium to big size companies is double: compliance with requirements from shareholders/third parties; to be able to adequately back the company claims, should it sue the employee for some reason. ↩︎
  3. A kernel-level snooper on a laptop is a good reason to be worried. ↩︎
  4. Fear of Missing Out: you might already know this, if not I saved you looking for it on the internet. ↩︎
  5. My full solution leverages systemd user units and a target to spawn all the services I need at once, but the gist of it is in those two commands. ↩︎
  6. Inter-Process Communication. ↩︎
  7. Setting up a pair of certificates such that the two ends are mutually authenticated is not easy. I did create a specific binary in the scapegoat project, called scapegoat-certs, to make the process easier. ↩︎

TIL: apcupsd wants no device

After some time, I found this very useful piece of information, on how to make function again apcupsd. The gotcha is this

you should change DEVICE /dev/ttys0 to DEVICE in /etc/apsupsd/apsupsd.conf with nothing after it, this way apcupsd search everywhere on the system to find the UPS and connect correctly

Thanks internet!

Starting the erlang observer from within a docker container

I am currently working with elixir. It is a neat language, with a lot of good tooling. It’s rooted in the erlang world. A very useful tool to have some overview on the internals of the BEAM is the erlang observer.

Nowadays, the common workflow relies on containers. It is a very common issue to try to start graphical applications from within a container. Let’s prepare a playground

FROM elixir:1.10.4

ARG uid=1000
ARG gid=1000

RUN groupadd -g ${gid} alchymist \
    && useradd -u ${uid} -g alchymist alchymist \
    && mkdir -p /test \
 && chown alchymist:alchymist /test

USER alchymist
WORKDIR /test

ENTRYPOINT ["iex"]
CMD []

We can build it with

docker build --build-arg=uid=$(id -u) --build-arg=gid=$(id -g) -t alchymist:0 .

Let’s start normally

docker run --rm -ti alchymist:0

Trying to start the observer, we get an error

Erlang/OTP 22 [erts-10.7.2.2] [source] [64-bit] [smp:8:8] [ds:8:8:10] [async-threads:1] [hipe]

Interactive Elixir (1.10.4) - press Ctrl+C to exit (type h() ENTER for help)
iex(1)> :observer.start()
09:46:02: Error: Unable to initialize GTK+, is DISPLAY set properly?
                                                                    {:error,
 {{:einval, 'Could not initiate graphics'},
  [
    {:wxe_server, :start, 1, [file: 'wxe_server.erl', line: 65]},
    {:wx, :new, 1, [file: 'wx.erl', line: 115]},
    {:observer_wx, :init, 1, [file: 'observer_wx.erl', line: 107]},
    {:wx_object, :init_it, 6, [file: 'wx_object.erl', line: 372]},
    {:proc_lib, :init_p_do_apply, 3, [file: 'proc_lib.erl', line: 249]}
  ]}}
iex(2)>

The trick is to mount the needed files and pass the correct value for the environment variable DISPLAY.

docker run --rm \
    -v $HOME/.Xauthority:$HOME/.Xauthority:rw \
    -v /tmp/.X11-unix:/tmp/.X11-unix \
    -e DISPLAY=$DISPLAY \
    -ti alchymist:0

Starting the observer, we then succeed

Erlang/OTP 22 [erts-10.7.2.2] [source] [64-bit] [smp:8:8] [ds:8:8:10] [async-threads:1] [hipe]

Interactive Elixir (1.10.4) - press Ctrl+C to exit (type h() ENTER for help)
iex(1)> :observer.start()
:ok
iex(2)>

the erlang observer started from a process inside a container

OpenSSH keys on a FIDO2 dongle

OpenSSH recently introduced support for ECDSA keys (and Ed25519) on external dongles. I own a solo key. I wanted to try it, but the majority of the machines I have access to over ssh do not yet support this feature (as far as I get, the server version must be >= 8.2).

I created a docker image to allow me to test this feature. First I created the keypair:

ssh-keygen -t ecdsa-sk -f ~/.ssh/my_ecdsa_sk

I am prompt first to touch the dongle, then to insert a passphrase to secure the key.

I used this Dockerfile

FROM debian:sid

ARG uid=1000
ARG gid=1000
ENV DEBIAN_FRONTEND=noninteractive

RUN apt update && apt install --no-install-recommends -y openssh-server \
    && sed -i 's/PermitRootLogin prohibit-password/PermitRootLogin without-password/g' /etc/ssh/sshd_config \
    && mkdir /run/sshd \
    && groupadd -g ${gid} uzer \
    && useradd -u ${uid} -g ${gid} -m -d /uzer uzer \
    && mkdir /uzer/.ssh \
    && chown uzer:uzer /uzer/.ssh \
    && chmod 700 /uzer/.ssh \
 && rm -rf /var/lib/apt/lists/*
COPY --chown=uzer:uzer key.pub /uzer/.ssh/authorized_keys
COPY entrypoint /entrypoint

EXPOSE 22

ENTRYPOINT ["/entrypoint"]
CMD [""]

with this entrypoint

#!/bin/sh

exit_all() {
  kill $(cat /var/run/sshd.pid)
  exit 0
}

trap exit_all INT TERM

/usr/sbin/sshd -E /var/log/sshd.log

tail -f /var/log/sshd.log

Then I build the image (first copying my newly generate public key to the root of the directory where these files are, naming it key.pub)

docker build -t sshd-sk:0.1 .

and launch a container from it:

docker run --rm -p 10022:22 sshd-sk:0.1

At last, I am able to connect

ssh -i ~/.ssh/my_ecdsa_sk uzer@localhost

I am prompt first to provide the passphrase, then to touch the dongle

Enter passphrase for key '/home/me/.ssh/id_ecdsa_sk': 
Confirm user presence for key ECDSA-SK SHA256:CENSORED
Linux ddcb668dd8b3 5.7.4-arch1-1 #1 SMP PREEMPT Thu, 18 Jun 2020 16:01:07 +0000 x86_64

The programs included with the Debian GNU/Linux system are free software;
the exact distribution terms for each program are described in the
individual files in /usr/share/doc/*/copyright.

Debian GNU/Linux comes with ABSOLUTELY NO WARRANTY, to the extent
permitted by applicable law.
$

Next step is to experiment with the resident key thing, that should enable one to carry around only the dongle.

Quassel and Let’s Encrypt

I love Let’s Encrypt. It is just the right way to secure our http communications.

And I love IRC, and chatting with people using it. Because is a well known and long lived protocol and because it is there a lot of tech geeks and nerds gather 🙂

Team Chat(from https://xkcd.com/1782/)

I also love Quassel (https://quassel-irc.org/), not because it is written in Java (I do not understand it), but because of its paradigm (a core that acts as a client to the IRC servers and to which many clients can connect). And because it is a good solution to use IRC on the smartphone (at least on Android), because connections to IRC servers are unstable via mobile connections.

What I disliked is the fact that I have to authenticate the client to the core at first connection. This is because Quassel core creates a self-signed certificate at installation. This is one of the problems of not having a widespread and accessible system to secure our communications via TLS…but we have it!

Let’s obtain a Let’s Encrypt certificate:

$ certbot certonly --standalone -d my.domain.tld

Following the procedure, we will obtain the certificate, the fullchain and the private key in a specific folder

$  ls /etc/letsencrypt/live/my.domain.tld 
cert.pem chain.pem fullchain.pem privkey.pem README

Now, let’s check where Quassel reads the configuration. On debian-based installations, Quassel creates a user quasselcore with a specific home directory

$ cat /etc/passwd|grep quassel
quasselcore:x:109:114::/var/lib/quassel:/bin/false

There it is

$ ls /var/lib/quassel 
quasselCert.pem quasselcore.conf quassel-storage.sqlite

Let’s backup the self-signed certificate

$ mv  /var/lib/quassel/quasselCert.pem /var/lib/quassel/quasselCert.pem.old

And now let’s use the Let’s Encrypt one

$ cat /etc/letsencrypt/live/my.domain.tdl/{fullchain,privkey}.pem >> /var/lib/quassel/quasselCert.pem
$ systemctl restart quasselcore

And now we can connect to my.domain.tdl with a Let’s Encrypt signed certificate!

If you want also to automate this procedure on certificate renewal, you can create a systemd unit like this

$ cat /lib/systemd/system/quasselcert.path
[Unit]
Description=Triggers the recreation of quassel certificate at certificate renewal 

[Path]
PathChanged=/etc/letsencrypt/live/my.domain.tld/privkey.pem

[Install]
WantedBy=multi-user.target
WantedBy=system-update.target
$ cat /lib/systemd/system/quasselcert.service
[Unit]
Description=Recreation of quassel certificate at certificate renewal

[Service]
Type=oneshot
ExecStartPre=/bin/rm -f /var/lib/quassel/quasselCert.pem
ExecStart=/bin/bash -c 'cat /etc/letsencrypt/live/my.domain.tld/{fullchain,privkey}.pem > /var/lib/quassel/quasselCert.pem'

This should opefully work (not tested!).

Small tricks for large disks

Create a vmpool on an existing lvm logical volume

I have the very bad habit to create a volume group over which build the pool of
my main disk. Then I suddenly need a lvm pool for my virtual machines with libvirt.
I use this trick: I create a logical volume in the volume group, I place
another volume group inside the aforementioned logic volume and then I create
over it the lvm pool. In commands

% lsblk
sdb                         8:16   0   5.5T  0 disk  
└─sdb1                      8:17   0   5.5T  0 part  
  └─lvm                   254:1    0   5.5T  0 crypt 
    ├─vg-vms              254:2    0   600G  0 lvm   
    ├─vg-data             254:3    0   1.7T  0 lvm   
    ├─vg-Winzozz          254:4    0    30G  0 lvm   
    └─vg-shared           254:5    0     8G  0 lvm
% sudo lvcreate -l 100%FREE vg -n vmpool-me

% sudo vgcreate vmpool /dev/mapper/vg-vmpool--me

% lsblk
sdb                         8:16   0   5.5T  0 disk  
└─sdb1                      8:17   0   5.5T  0 part  
  └─lvm                   254:1    0   5.5T  0 crypt 
    ├─vg-vms              254:2    0   600G  0 lvm   
    ├─vg-data             254:3    0   1.7T  0 lvm   
    ├─vg-Winzozz          254:4    0    30G  0 lvm   
    ├─vg-shared           254:5    0     8G  0 lvm   
    └─vg-vmpool--me       254:6    0   3.1T  0 lvm

% sudo virsh

virsh # pool-define-as vmpool logical - - /dev/Terone/vmpool-me vmpool /dev/vmpool
Pool vmpool defined

virsh # pool-build vmpool
Pool vmpool built

virsh # pool-start vmpool
Pool vmpool started

Obviously, everything is inside a luks encrypted partition 😉